Note: This is an article from Avalanche’s early days, back in 2020, before the mainnet went live! Back then there were no staking instructions available. In fact, we published this tutorial based on our own testnet experience, before it was even possible to move coins on the mainnet!!! We’ve kept this article in its original form as a historic record. Please visit the official Avalanche Staking documentation for current instructions (Hint: it’s much easier today! The official Avalanche Wallet is dead easy to use!).
The AVAX public sale, which closed on July 15 2020 after just a few hours, was an astounding success.
Investors looking for high yields flocked to the sale, buying all U$ 42 million worth of AVAX coins in just 4.5 hours. At our latest update, AVAX price was approximately U$ 13 – a 2600% yield on its U$ 0,50 public sale price. Absolutely incredible! And the best is yet to come for everyone who understands this amazing technology.
But, until the masses learn of the amazing tech behind AVAX, what’s driving such fast adoption of the world’s first Avalanche protocol cryptocurrency in the meantime?
Staking your AVAX
There’s more than one factor driving AVAX’s monumental success: its innovative consensus protocol and potential staking rewards are two of the most important factors in our opinion.
Since we’ve already published a bit about the Avalanche protocol, in this article we take a closer look at what users need to do to get started staking their AVAX in order to make 100% safe passive income!
There are two main options to stake your AVAX coins and generate passive income :
- Delegate your stake to a validator;
- Run your own validator node.
We’ll take a look at each case, but first we need to get ourselves an Avalanche wallet.
Access the Official AVAX Wallet
First of all, you’ll need to access the official AVAX wallet. Double check and make sure you are at https://wallet.avax.network/.

To be extra careful, examine the site certificate by clicking on the lock icon near the URL. It should look something like this:
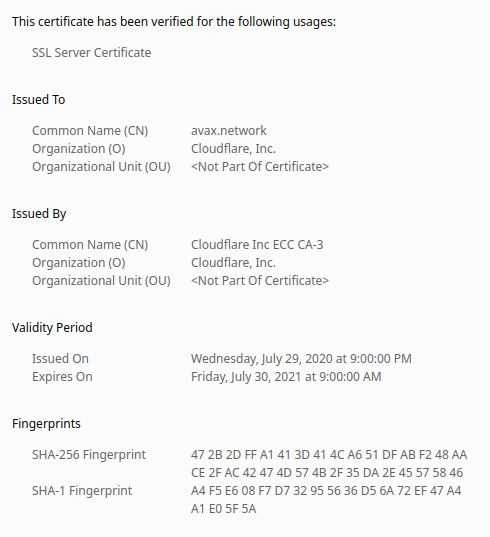
Even after you verify the host, you may still be asking yourself, is the AVAX wallet secure? Isn’t it unsafe to enter your secret key into a website?
Well, yes. It’s absolutely unsafe to enter your private key or secret phrase into a random website. But the AVAX wallet is not a regular website which sends everything to a server for processing.
The wallet app is an offline application, despite it running inside your web browser. It’s a Javascript app that uses web technology for the front-end, thus it renders inside your web browser – but it’s not actually running on a server.
It works similarly to Ethereum’s MyEtherWallet: a Javascript application is downloaded into the web browser’s memory and runs from there. Similar technology is used by the Electrum wallet, which is widely trusted by the Bitcoin community, except Electrum downlads its own renderer called Electronjs instead of using a web browser.
All these apps work similarly. You can unplug the computer from the network after you download the wallet and it’ll work fine. You just need to be online when you wish to broadcast a transaction. To be extra safe, you can unplug your computer from the network when you enter your secret key or mnemonic phrase. It does not submit any part of your key to the network for authentication. All is done offline.
The AVAX wallet app is secure as far as we know, but if you wish to be extra careful you can perform all these steps using the AVAX CLI on the command line interface. (We’ll dive into more details on using the CLI in a different article.) Again, everything can be done offline, except transmit the finished transactions.
For now, the entire AVAX community is using the official wallet without issues, so that’s a strong indicator that you may safely use it too.
Now it’s time to log in.
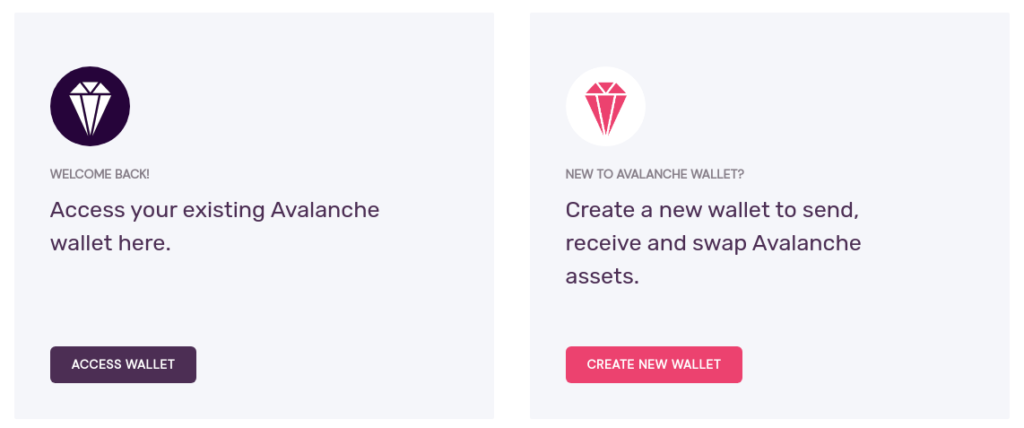
Here you have two options : you can either access an existing wallet or create a new one.
If your funds are already at your own address, then choose Access Wallet.
If, on the other hand, you’re still holding your funds at an exchange, then you will need to use the Create New Wallet function. Generate a new X-chain address and withdraw from your exchange into this address. As always make sure to get everything right so you don’t lose your funds here. (Sending to a wrong address is irreversible, so triple check everything.)
We won’t go into further details about withdrawing your funds from an exchange – from here onwards we assume your funds have been received in your AVAX wallet.
Move AVAX Funds to P-Chain
When you withdraw your AVAX from an exchange or transfer it between parties, you’re likely using the X-Chain.
In order to stake your AVAX, you need to have your tokens on the P-Chain (platform chain). For this, we use an Avalanche chain swap (one of Avalanche’s coolest features IMO).
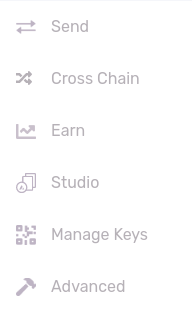
On the left menu, click on Cross-Chain:
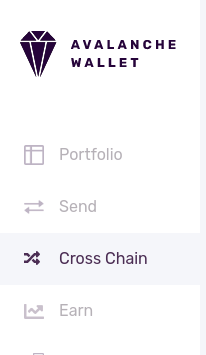
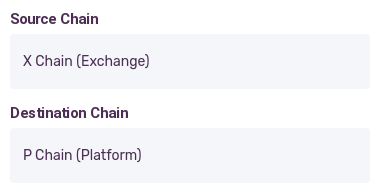
On the next screen, X-Chain and P Chain should be selected as default on the Source and Destination Chains respectively:
Now enter the amount you’d like to transfer between chains:
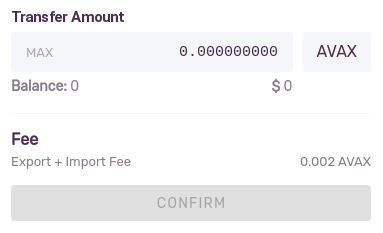
Notice how most amount fields on the Avalanche wallet allow you to click on “MAX” in order to fill the field in with your full balance. If you wish to stake 100% then click on MAX and Confirm. Otherwise enter the desired amount.
Wait a few seconds for the transaction to go through. This step would take at least 10 to 30 minutes on Bitcoin. But this is Avalanche, baby! TX finality will be reached in seconds!
Once the P-Chain balance is confirmed, we’re ready to move on to the fun part – selecting a validator node!
Choose an AVAX Validator
Once inside the AVAX wallet, it’s time to choose an appropriate validator node who’ll verify transactions on your behalf.
On the left menu, click on Earn:
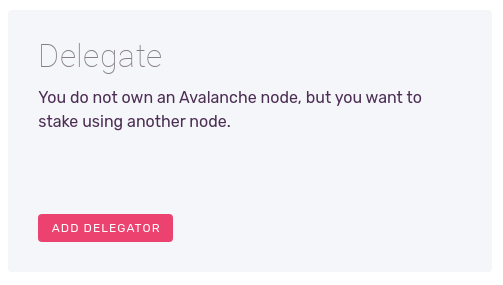
On the next screen, click on Add Delegator:
The official AVAX wallet application then shows you a list of currently live validator nodes. This list is read straight from the AVAX network, so you get fresh, working validators you can delegate your stake to. Your screen should

Any AVAX node is capable of verifying blocks and minting new AVAX. In fact, validator nodes aren’t special at all. You can even run your own AVAX node very easily. The only difference is that validators will stay online 24×7 so it never misses a vertex, so you may turn your wallet off the validator will remain online working for you.
What do you need to look at in order to choose a node?
Let’s take a closer look at the wallet node listing. These 6 columns are what you need to be looking at to choose an AVAX validator node to delegate to :
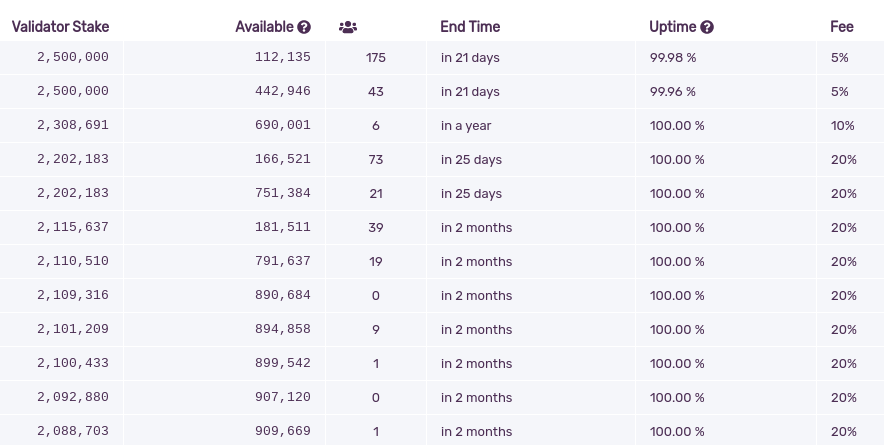
So, what does all this data mean? Let’s take a closer look at each variable:
Validator Stake: This is how much AVAX the node owner has himself committed to the node. Obviously, the higher the validator stake, the more you can assume this node owner will strive to keep the node 100% safe and operational since they, themselves, have staked a high amount into this very node.
Validators must commit at least 2000 AVAX in order to run their own node:
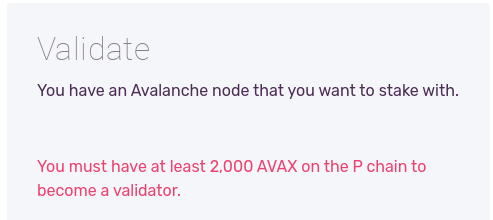
Once the validator node owner has staked a certain amount, they cannot modify it. This is why the validator stake is a very powerful metric: the node owner must commit to run this node until the “end time” column date. So much so, the AVAX wallet app ranks available nodes by validator stake! Delegators can assume that the node will be good until that date, otherwise the validator themselves stand to lose a good amount of money. So keep this in mind: validator stake is your most important metric.
Available : This is how much AVAX this node can still receive in delegations. To keep the network as decentralized as possible, there is a maximum amount each node can be delegated to. Currently, this is set to 5 times the validator stake. So a node where the owner staked 1 million AVAX can hold up to 5 million in delegations including its own delegated abount. So, in the above example, the node would be able to still receive 4 million AVAX in delegations (1 million validator stake + 4 million staked by the community). The “available” column within the wallet tells you how much AVAX can still be delegated to that particular node.
Delegator count: This column tells us how many individual addresses are delegating to this node. We can’t assume that each address belongs to a different person, but the average is probably pretty close to 1 address per user. Obviously, here the more people, the better. Chances are if a node has lots of delegators and something went wrong with it, you’ll quickly find out via social networks, Telegram and AVAX forums in general. As with all other cryptocurrencies, the larger the community, the higher the value. The same applies to validator nodes: the more people trust it, the more I’d trust it as well. What would you think of a restaurant which was always empty? On the other hand, you see a restaurant with long wait lines to get in. Which one would you believe offers the better service?
End time: AVAX rewards work a little different from other Proof of Stake coins. You don’t receive the reward every epoch or every block. Instead you commit to a certain period. The validator nodes themselves also commit to validate for a certain period. This column shows us how long more the current node will delegate for until its period is over. When the validator period expires, every delegator is automatically kicked off and paid their respective rewards. If you log into the wallet after your validator period expires, you’ll see your funds 100% available again. You must then choose a new validator node and stake again. The longer the validator commits, the greater their rewards up to 12% a year.
Uptime: So far we’ve looked at static metrics. Uptime, on the other hand, is a dynamic metric – a very important one at that. AVAX rewards are only paid if the validator node has 60% or more uptime. For instance, see this table of validator uptime from AVAX.dev :
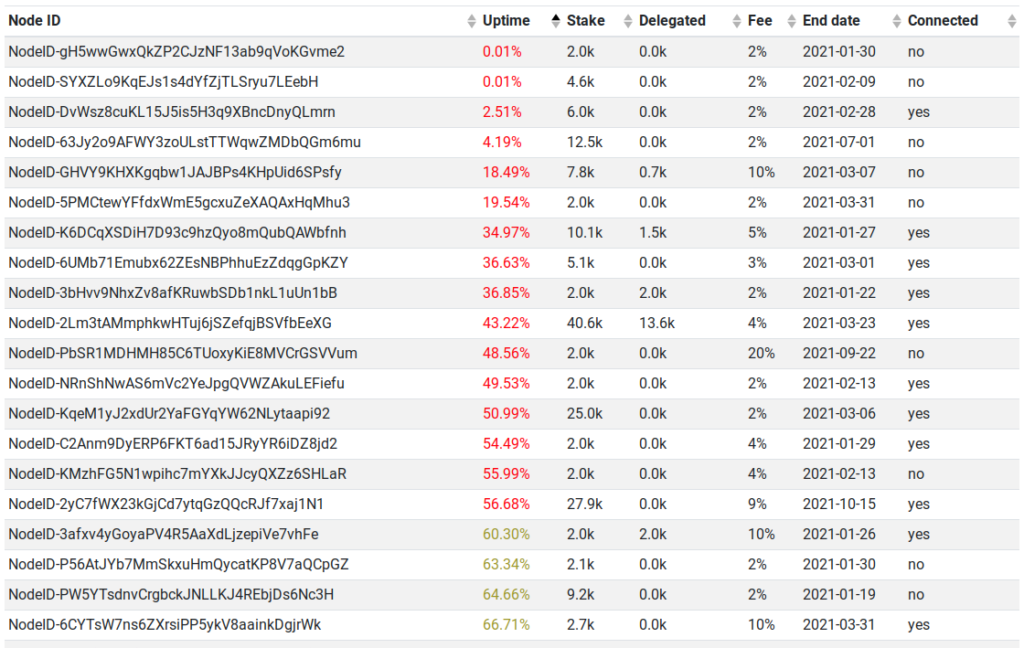
In this table, every node marked with a red Uptime value will not receive payments for their staking period because they’re below 60%. Although most funds have fled those nodes (see Delegated column), the minimum 2000 AVAX validator stake itself is not being rewarded.
This is probably one of the few places (if not the only one) where AVAX isn’t fully trustless. You depend on nodes being kept online by the node administrator, which is a trust relationship. Here we throw back to the validator stake amount : a node owner which, themselves, has staked a lot of money into their own node will likely keep their node running. Unless of course something tragic happens, such as the node admin passing away or being unable to keep the node up due to some unpredictable event. So keep in mind: you will only get paid rewards if the overall node uptime is > 60%
Fee: Last but not least, there’s the validator fee. A lot of newbies like to choose their validator by the lowest fee, but as you’ll quickly learn this isn’t always the best choice. I learned this while staking Cardano and Tezos : many low fee validators are in the game for short periods, not for the long run. They add tons of low fee nodes using low validator stake, attract a bunch of delegators, break their competition and then raise the fees on the next epoch. The fee is your contribution to the node owner. Node owners must keep machines running 24×7, pay for infrastructure (outsourced or their own), secure the network, update the node software, keep in touch with other delegators for community information and so on. A 20% fee is an absolutely fair amount to pay for a good validation service.
As you can see, choosing a validator is a balancing act. High validator stake, good uptime and a reasonable fee make a good validator node. Aside from uptime, there is nothing else you depend on the validator operator themselves. In any case there is zero risk of losing your investment. Worst that can happen is the uptime falls below 60% and you lose the rewards only.
Once you’ve chosen a validator, it’s time to delegate your AVAX!
Delegate your AVAX to a Validator

On the validator node listing screen you can see a red button to the right of each validator. All you have to do is click on select then we move onto the next screen where you choose the delegation parameters:
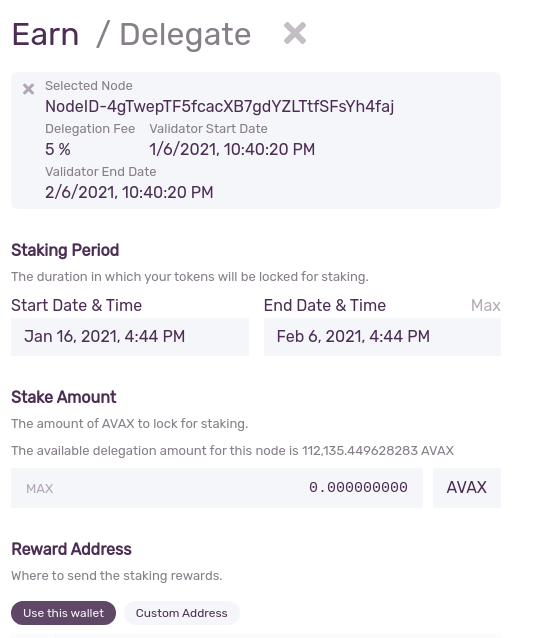
This is a pretty intuitive screen. First a few validator node parameters are shown: the node ID, the delegation fee, the date this node began its current validation period and when it ends.
Here you must choose a validation period and a stake amount. These are left entirely up to you, but remember you will not receive rewards before this period. So if you need the AVAX in the short term, make sure you do not choose too long a period here. If, on the other hand, you don’t need these funds in the short term, then the longer you stake the better. Rewards are proportional to the staking period, up to 12% a year.
After you select the period and amount, to the right of your screen you’ll see the confirmation dialog:
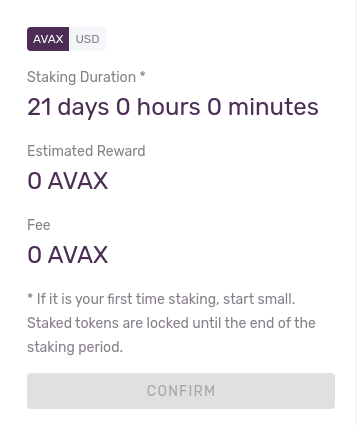
Here you’ll see a summary of the delegation transaction that you’re about to send into the network. If you agree, then the Confirm button will show up red and you’ll be able to submit the TX to the Avalanche blockchain. (You’ll be impressed by the finality time – your TX will likely get confirmed in seconds!)
How AVAX Staking Works
The wallet makes it all look simple, but what’s happening in the background in this process is really interesting.
Your wallet will create a special transaction called a “certificate”. Which is a cryptographically “legal document” that tells the network you are designating a certain validator the right to vote on your behalf.
You will then be asked for your wallet password in order to sign this certificate. Once signed, the cert gets broadcast to the network and everyone become aware that your coins are now delegated to the chosen validator.
You will begin receiving rewards on the next network cycle.
Note that validator choice never puts your AVAX at risk. Delegation certificates don’t give the validator the right to spend your AVAX, ever. it simply tells the network you’re delegating your voting rights to a validator so that it can stake the coins on your behalf.
Become an AVAX Validator
You also have the option to become a validator node. Since the node software is very lightweight and is also what powers a full node wallet, you’ll be a validator as soon as you run your wallet.
The main difference is you’ll be responsible for keeping the node online 24×7. Also, to become a validator, you’ll need to stake a minimum of 2000 AVAX. This relatively high cost is required so malicious parties can’t create thousands of rogue nodes to act like a majority of stakers, which would allow them to defraud the system (sybil attack).
Any AVAX node is capable of verifying blocks and minting new AVAX. In fact, what we’ve come to know as validator nodes aren’t technically special at all. Which means you can run your own AVAX node very easily. The only difference between a dedicated validator node and a general purpose wallet, is that dedicated validators should stay online 24×7 so it never stops working.
AVAX Staking Yield
According to our estimates, average AVAX staking yield will be approximately 10% APY. Currently, maximum yield is 12% APY, but for this you’ll need more than 60% uptime and to never miss a day of staking throughout the entire year.
Staking your Locked AVAX
If you took part in the public sale options A1 and A2, then your AVAX are most likely locked up for 1 and 1.5 years respectively.
Don’t worry, though, because your AVAX will be working hard for you during the vesting period! All AVAX bought during the public sale are locked in the vesting contract, which can be staked using the procedure we detailed. Access the AVAX wallet where you received the public sale funds and check your balance. If it shows as “available” then you must transfer funds to the P chain and then you can stake the funds.
If you took part in the public sale you’ll receive the same returns as everyone else who purchased AVAX through different means.
Avalanche Staking on Binance
At the time of this writing, AVAX staking at Binance was not yet enabled.
Here you can verify which Proof of Stake assets can be staked at Binance. Until our latest update AVAX was not yet enabled, but should be soon!
Keep in mind that coins tend to gain massive value once they get listed for Binance staking!
Coinbase and other AVAX staking exchange announcements are largely expected in 2021, though no official word is yet available. (We expect some delays due to the pandemic.)
Travala Staking
We get all sorts of questions about Travala AVA staking. This is because early on during its development, Avalanche coin was called AVA. It was then changed to AVAX before the July 2020 public sale.
Again: Travala AVA is in no way related to AVAX. At all. Forget AVA.
The Avalanche coin is called AVAX.
Links
crypto.bi - SHA256(crypto) Inc - Piazza Giordano A147 - 978 - contact@crypto.bi - We love Rome, Italy + Barcelona - 17DAB9EF880DA3BF
